

So you want to start a blog huh…
Not sure where to start or how it’s done?
Well lucky for you champ this post here will tell you exactly how you can have a functioning live blog online in less than 30 minutes from now.
Don’t believe me? Set up a timer for 30 minutes and walk through the steps below
A quick overview of what we will be doing:
– Getting a domain name
– Getting hosting for your site
– Linking your domain with your hosting
– Installing WordPress (self hosted)
– Changing your WordPress theme
– Writing your first blog post
If you don’t have a monkeys (clue) what the above are, don’t worry my friend all shall be explained shortly
After you run through this tutorial you will have a blog online, it’s not complicated when you know exactly what to do
However if you want my expert team to HELP you to set up and install your WordPress blog FOR FREE – Click Here to Get Your Free WordPress Blog Setup and Let Us Do The Work For YOU
Here we goooo….
STEP 1 – Getting A Domain Name
What is a domain name I hear you ask…
Well it’s the www.championbloggers.com address you put in the search box at the top when you are visiting a website
That address is called a domain name, its YOUR website address
So you need one
What should it be?
Depends what will you blog about? Sports, fashion, business, pets, your addiction to collecting superhero action figures?
Or you can just use your name like YourName.com
As long as you follow these 7 tips for choosing the perfect domain name you will be good
However there’s a zillion websites online, so a lot of domain names are taken.
You can use this nifty little tool which shows you in real time, as you type, if the domain name is available or not.
Remember to try different variations etc.
Here is the tool you can use now: https://instantdomainsearch.com/ (promise you’ll come back?)
Once you’ve got the green available BUY/sign, well done!
You’ve found one!
Now it’s time to register that name
Which extension domain should I get?
Extensions are the .com/ .co.uk/ .org parts of the domain name
I most always try and get the .com for a domain name
It’s the most popular and well known around the world.
But if you do want to go for a .co.uk, if your blog for example just wants to target the United Kingdom, or if you are blogging about some organisation, you could go for the .org name
If you’re unsure just go with the .com name extension (worldwide web domination!)
I purchase all my domain names at Godaddy.com which is a domain name register company
I have been using them for over 10 years and their service, support and user interface is nice and easy to use.
BUT WAIT in step 2 I show you how you can get your domain name for FREE, so hold up champ
Once you have got your domain name idea, you’re done! On to step 2
NOTE: Don’t get too hung up on what your domain should be, people get stuck on this first step and then spend weeks and months trying to think of the perfect domain
If you’re struggling follow these 7 tips for finding the perfect domain name
…then decide on one.
STEP 2 – Hosting
No not your dinner party
I’m talking about website hosting.
Your website needs to be hosted somewhere (stored somewhere on a server online so people can actually visit it)
So its like you registered your name now you need to put your house (website) on the internet street (word wide web)
Where do I get hosting?
There are hundreds of web hosting companies online. So which should you use?
I have used and tested around 7-8 different website hosting companies in the past, some have been terrible, some have been great.
Your hosting should be secure, fast, easy to use, reliable and most importantly have great support, so when you come across a problem or have questions the company is there to help.
I can’t stress the importance of this enough…
One host I was with a few years ago had terrible support, I was launching a new site and on the launch day my site went down and I could not get hold of anyone for support until 2 days later. So this cost me time, money, reputation etc. I was not happy to say the least.
This is why having great support from a company who are available 24 hours a day is very IMPORTANT
As a beginner and someone who has just started a blog I would recommend BlueHost
– They have been around since 2003
– They host over 2 million websites
– They are very reputable and easy to use
– They make installing WordPress a breeze without any technical knowledge (something we will be doing later)
– They have 24/7 expert support
– AND they give you a free domain name!
You can get started with website hosting for as little as $2.75 per month
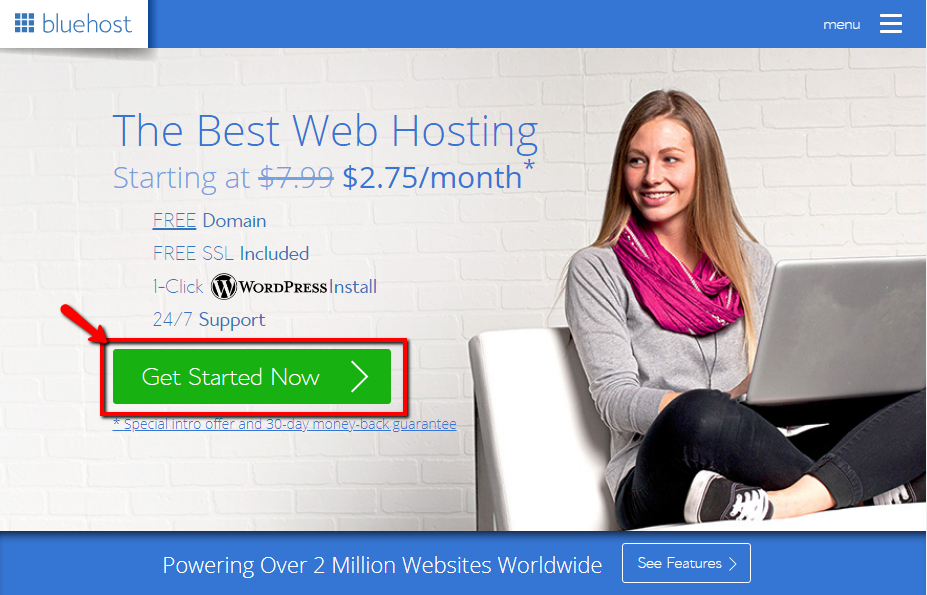
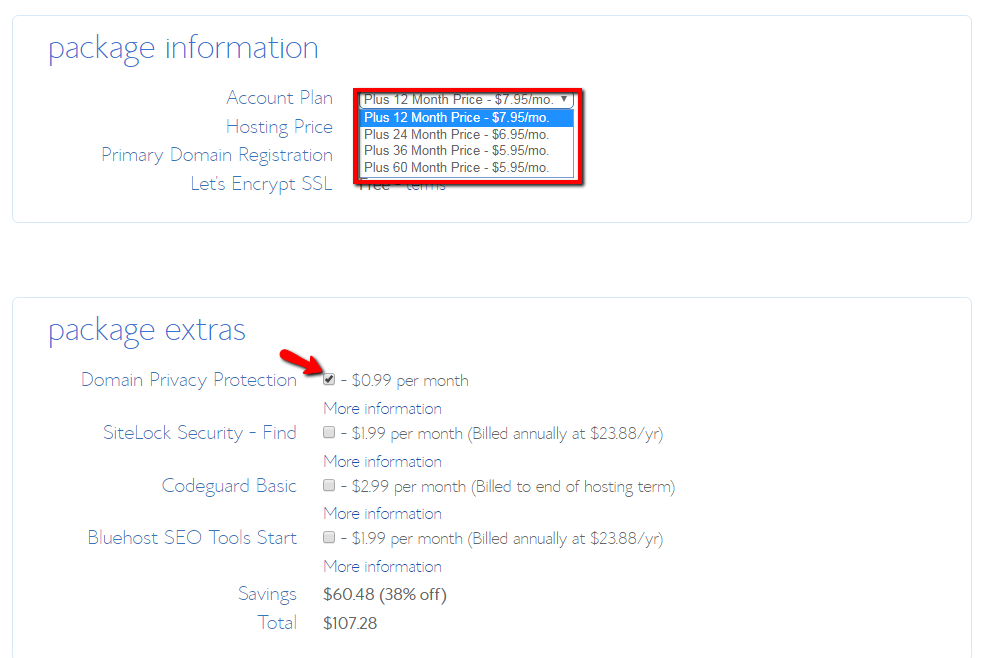
After clicking on “Get Started Now” you will have a couple of different packages to choose from:
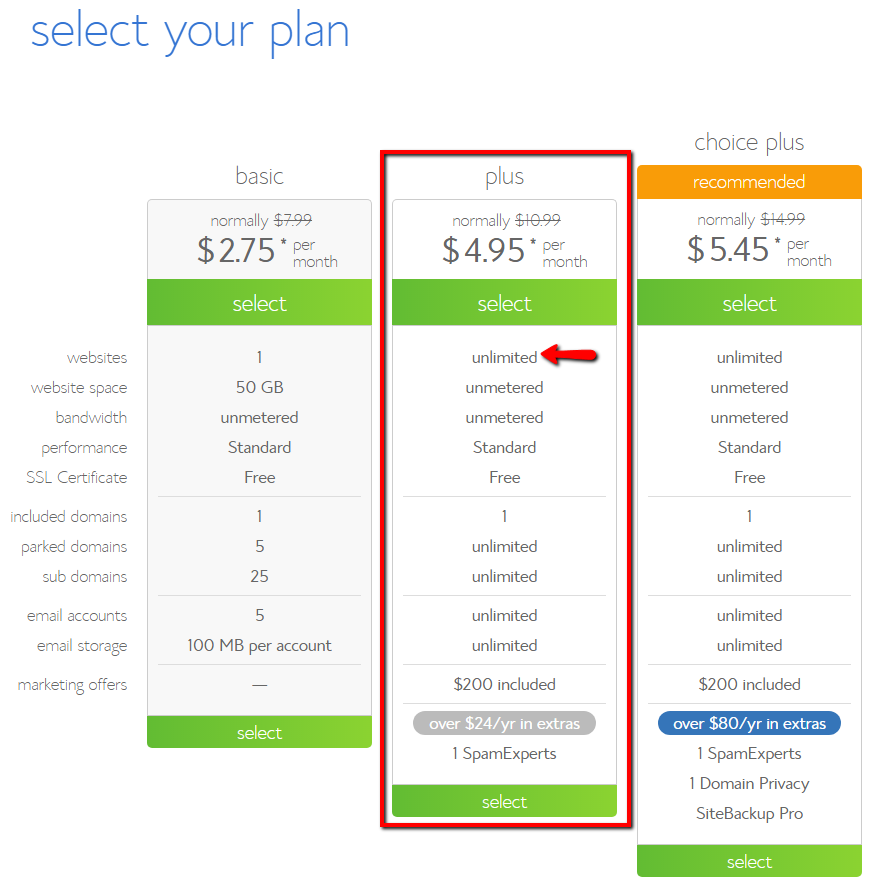
However if you want to keep costs down the basic package is good enough to go with, you can always upgrade later when you need to.
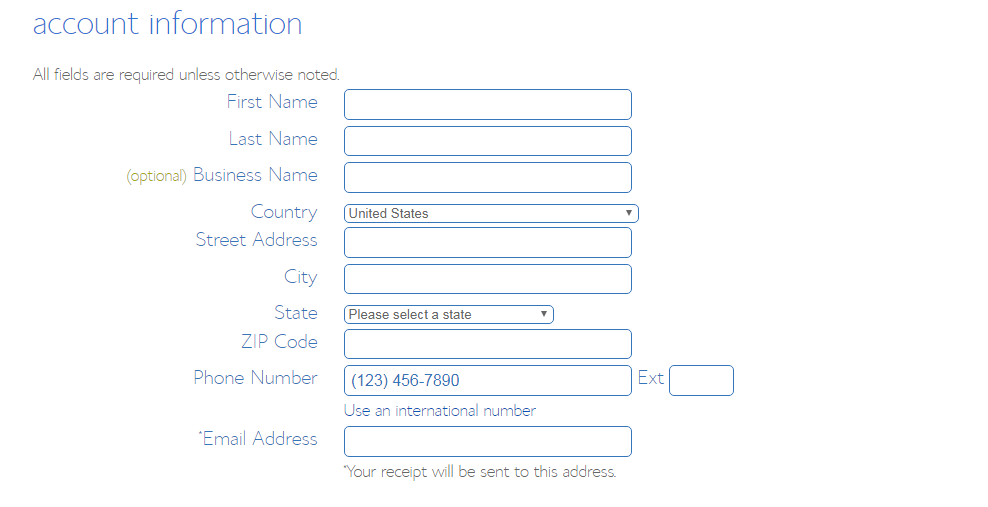
After selecting your package, choose “new domain” and enter the domain you would like to get for free when you get the hosting package
(If you already have a domain name and just want to host it at Bluehost you can click the “I have a domain name” and continue there)

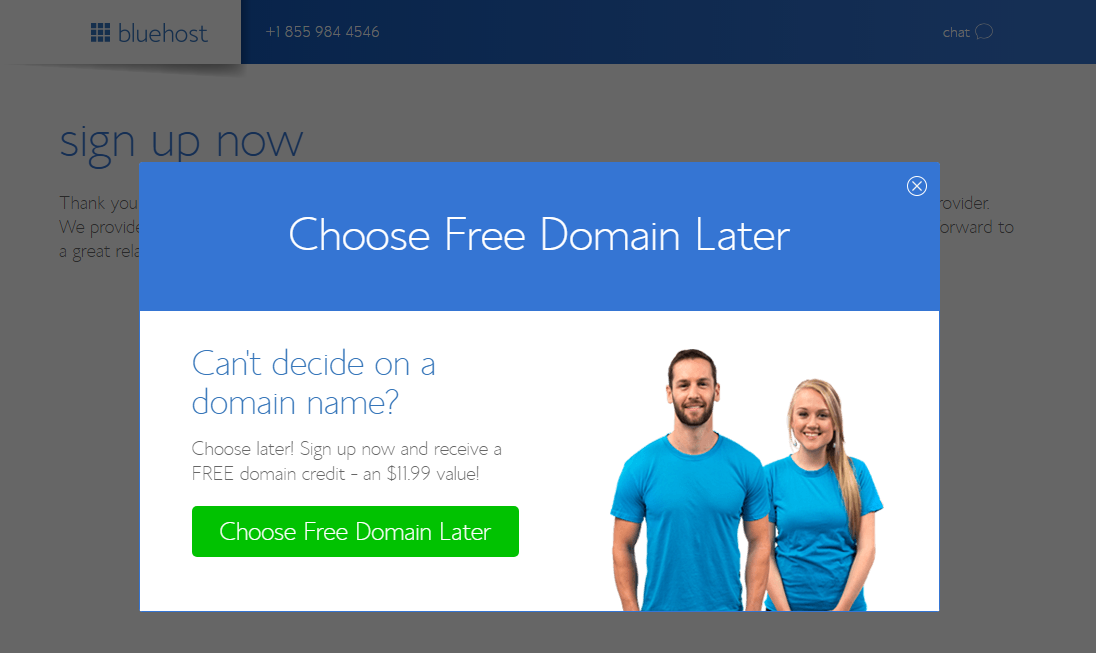
If you stay on that page for a couple of minutes a pop up will appear saying you can still continue getting your hosting account without deciding on the domain name right now. But you are still eligible for the free domain later as they give you credit.
You officially own land on the interweb (you have hosting for your blog)
TADAAAA!
STEP 3 – Linking Your Hosting With Your Domain Name
If you got a new domain with your Bluehost account this will already been done for you and you can jump to STEP 4
However if you did not and got your domain from Godaddy or somewhere else, what you need to do here is link them together.
Your domain name needs to communicate with your hosting, so everything works in sync.
This is called changing your nameservers (sigh… more technical jargon)
Its easy dont worry.
You just need to login to your godaddy account (or your domain name register company)
Find the relevant domain name
Click on the manage domain name button
Find the “change nameservers” button
Now you need to find the nameservers of your hosting company (Bluehost)
This can be found in the email once you signed up to bluehost and inside your bluehost account
They will look something like:
Ns1.bluehost.com
Ns2.bluehost.com
Then you need to copy and paste these inside your Godaddy account as follows:
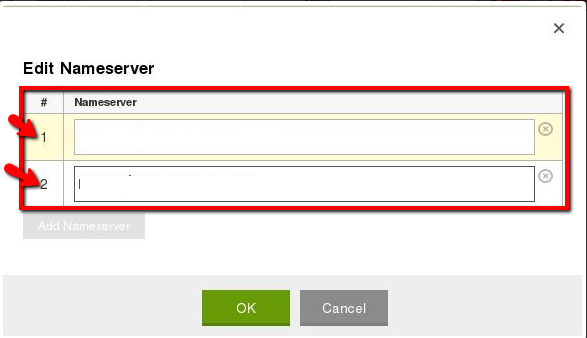
You have successfully got a domain name and hosting, and linked them together so all the cogs of this interweb thing work properly.
NOTE – It can take up to 24 hours for the linking process to complete, most of the time it’s a lot sooner, so don’t worry if it’s not happened straight away.
STEP 4 – Installing WordPress (self hosted) Blogging Platform
This is the part where you install your blog.
We are going to be using WordPress which is a blogging platform. It is by far the BEST and most used blogging platform out there.
I only ever use WordPress for my blogs
Here is where it might get confusing…
There are 2 versions of WordPress, the free hosted version (BAD) and the free self hosted version (GOOD)
We in this tutorial are getting our own hosting, and installing the free WordPress self hosted blogging platform (GOOD)
You’re on the right tracks, I am just informing you of the difference.
There are many free hosted blogging platforms out there that such as WordPress (hosted), Tumblr, squarespace, wix, medium, weebly etc.
However you want to avoid these free hosted services, as they are free for a reason. They have many limitations and restrictions on what you can do.
You never have full control and if you plan on making money from your blog then most of these free services don’t allow you to do this on their platforms.
So sticking to this tutorial and installing your own self hosted WordPress blogging platform is the best thing for you to create a blog, grow a blog and make money from your blog.
To install wordpress onto your hosting you want to log into your bluehost account
Find the website section and select Install WordPress
Click on the INSTALL button
Choose the domain name you want to install it to (the domain name you created earlier)
The field next to the domain you can leave blank as this will install WordPress on the main homepage (unless you have specific requirements that you want your blog only to be installed in a subfolder of your website e.g. you can enter “blog”)
Choose a username and password
Make sure these are secure! Change your username from the default “admin” to something else
And make sure your password is STRONG
Use a combination of uppercase, lowercase, numbers, and symbols to ensure you have a secure password.
Truth is websites get hacked everyday and changing your username and having a strong password, vastly reduces the chances of some web-bot getting into you site
Agree to the terms and conditions and INSTALL
(Make sure you save your login details etc.)
WELL DONE CHAMP! You’re Done
Step 5 : Changing Your WordPress Theme
Now you have successfully got a brand new blog online and functioning. The first thing you will want to do is change your theme. The theme is the general look and layout of your site.
WordPress have multiple free themes you can download and activate.
If you head over to your WordPress dashboard by going to your domain then /wp-admin
E.g. https://www.championbloggers.com/wp-admin
Once logged in with your username and password
On the left hand side head over to “Appearance” then “Themes”
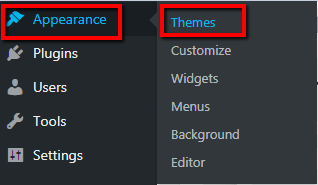

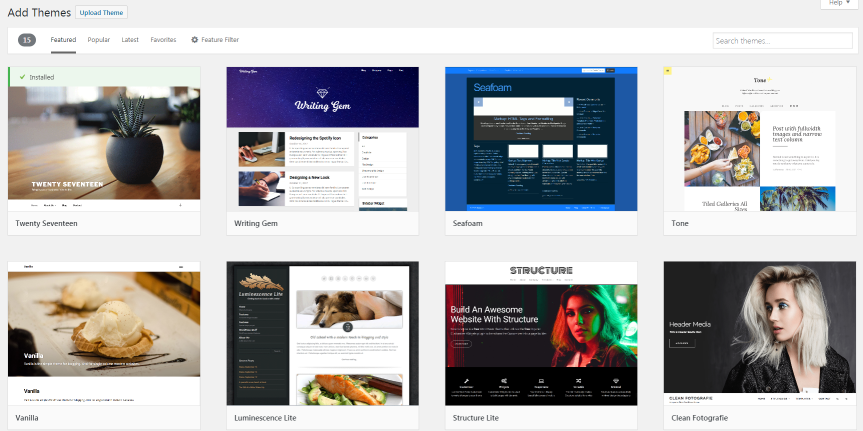
Once you have decided on one you like you can click on the “install” button
After it has been installed, you just need to click on “activate”
…and VOILA!
Neat looking blog!
Although the free WordPress themes are great to get started with. There are a lot of paid themes out there that have a lot more functionality, are faster and easier to use. Some of the best themes even allow you to edit page like you would edit a word document, rather than messing around with code etc.
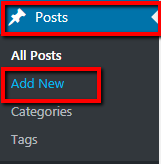
Step 6: Writing And Publishing Your First Post
The structure and groundwork of your blog is set up. Now it’s time to start writing.
To start writing your first ever blog post go over to “Posts” then “add new”
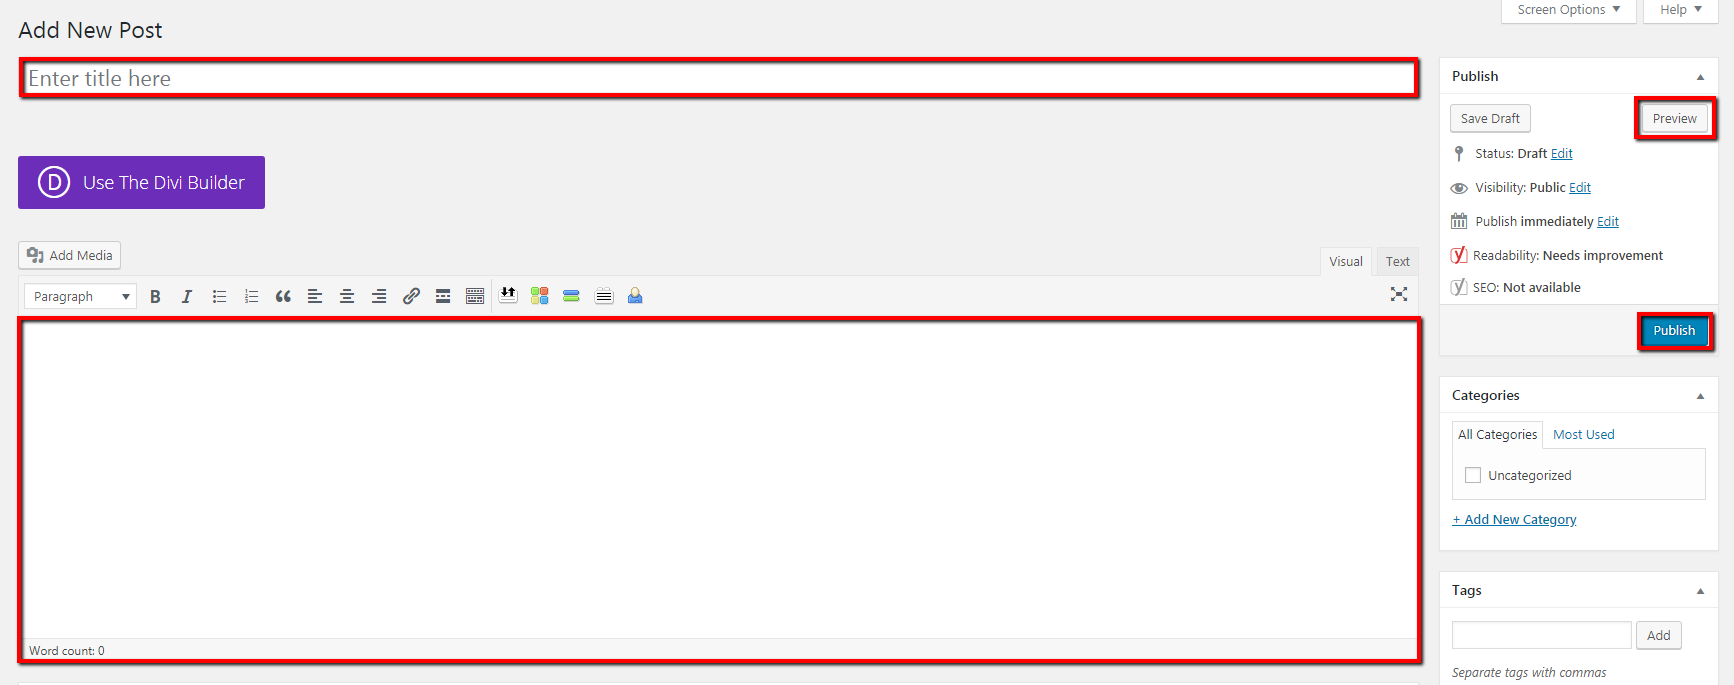
Yeah I know, it can be a bit scary writing and publishing your first ever post. But we all start somewhere.
Write your first post, write about how you just set up your blog and what you plan on talking about in the future.
Conclusion
You have gone from nada to having a domain name and hosting. Which has a wordpress blogging platform installed and ready to go.
The foundations of your blog have been built.
Now you need to start writing to make your blog come alive!
Hope you liked the tutorial, if you have any questions at all, or need help please leave a comment below.

